Adding custom CSS to your Bloggle blogs: a step-by-step Guide
In this blog post, we will teach you how to enhance your Bloggle blogs with custom CSS. This step-by-step guide covers two main scenarios: applying CSS globally across all your blogs and adding CSS to a specific blog post.
Whether you want to add a personal touch to your Bloggle blogs or improve the readability of your content, custom CSS can help you achieve that. In this article, we will walk you through the process of adding custom CSS to all your Bloggle's blogs or just for a specific article.
Table of content:
How to add custom CSS for all blogs?
How to add custom CSS for a specific blog?
How to add custom CSS for all blogs?
To apply custom CSS for all your blogs, follow these simple steps:
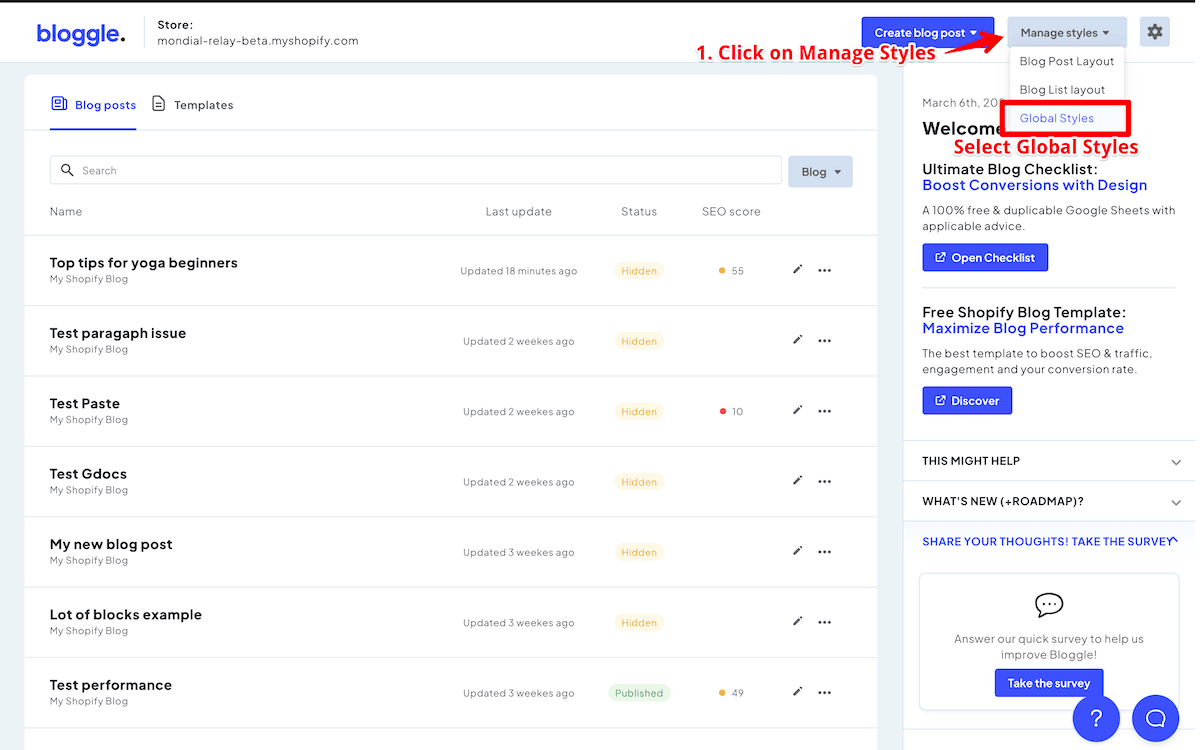
1. Open the global style features

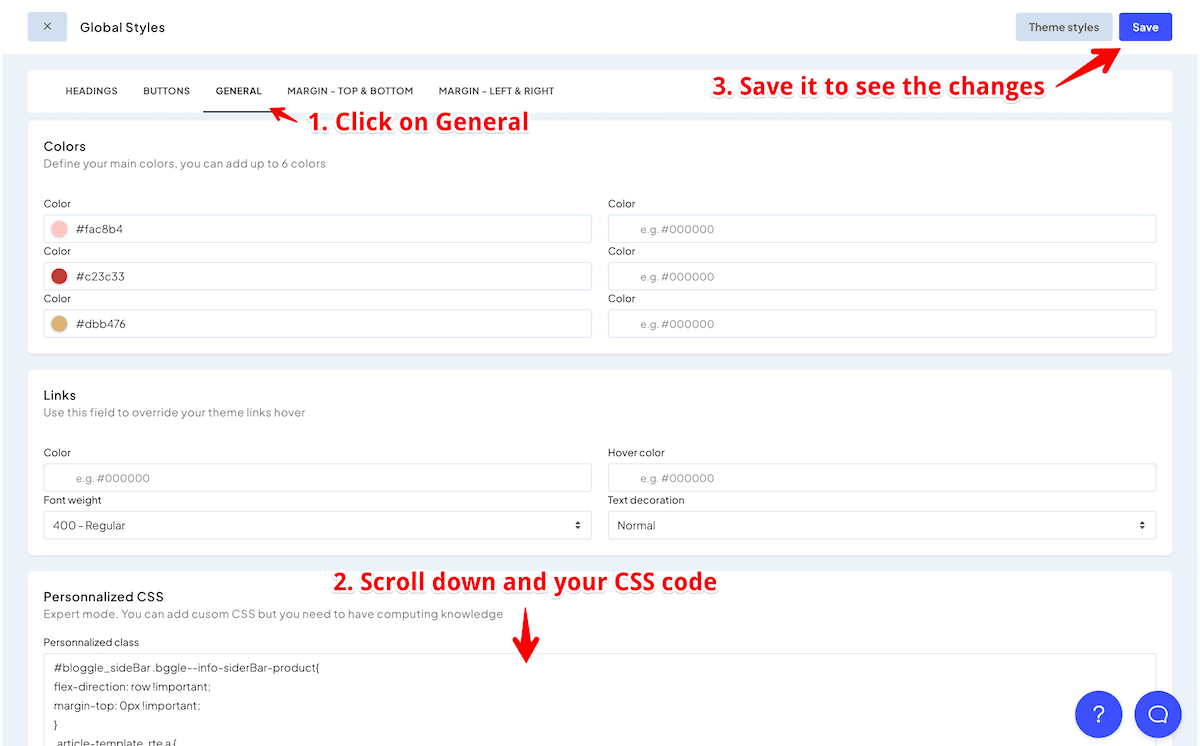
2. Navigate to general -> Scroll down

4. Save your changes
The CSS will be applied to all current and future blogs created with the Bloggle app.
How to add custom CSS for a specific blog?
If you want to apply custom CSS only to a specific blog post, follow these steps:
1. Open the article editor
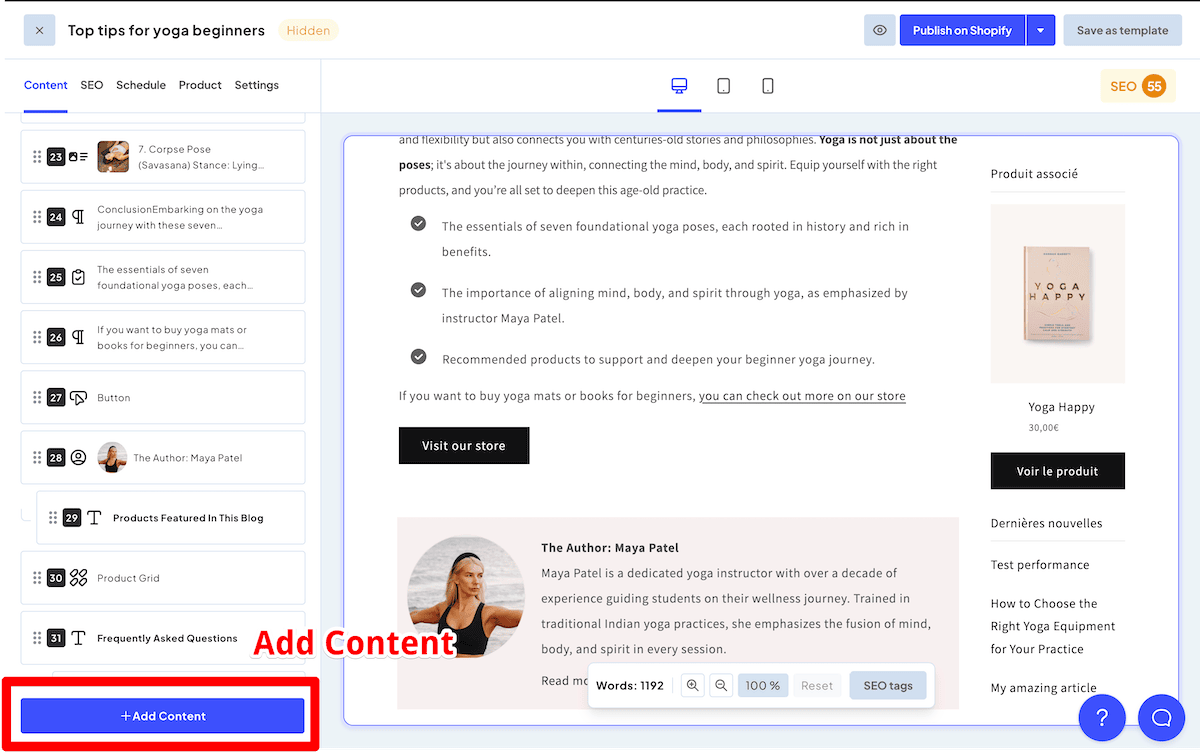
2. Click on "Add content" button

3. Scroll and select "Embed code" section to add it to your blog
.png)
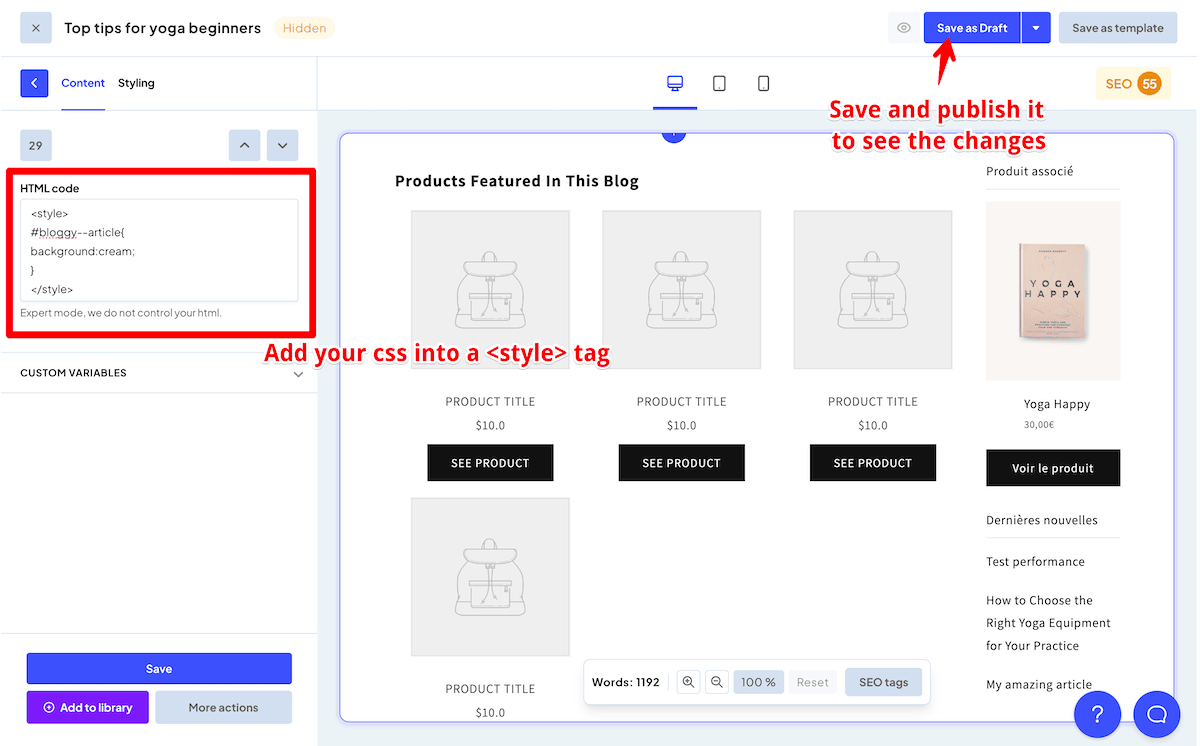
4.Add your styles
5. In the provided code section, add your CSS within a <style> HTML tag. To avoid any unexpected styling issues, it's recommended to apply styles to #bloggy--article nested classes.

6. Save as draft
Conclusion:
Customizing the appearance of your Bloggle blogs with CSS is an easy and effective way to enhance your content and make it stand out. With this step-by-step guide, you can now add custom CSS to either all your blogs or a specific blog post with ease.

